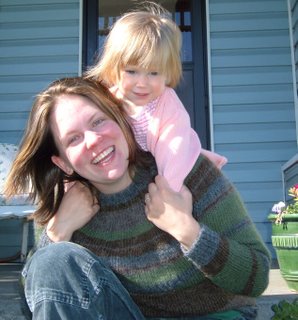
For those of you hoping to avoid the hydrogenated fats, High fructose corn syrup and lard in your pie this holiday season! A pie crust for you!
Whole-Wheat Pie Crust: the new Whole grains cookbook
makes 1 pie crust for 9-inch pan
1 c whole wheat pastry flour
1/2 teaspoon salt
6 tbsp. cold unsalted butter
1/2 tsp. rice vinegar
3 Tbsp. ice water
In a medium bowl, mix flour and salt. using large holes on a box grater, grate butter into flour mixture. With your fingertips, work butter into smaller pieces for about one minute.
Mix vinegar with ice water, and sprinkle over flour mixture while tossing it with a fork. Try to press mixture together and if it's too dry, sprinkle in more water, a teaspoon at a time.
When it just comes together, form dough into a ball and cover tightly with plastic wrap. Chill for 20 min. to 1 hour. Don't chill longer than an hour and be careful not to overwork the dough. Recipe can be doubled to make a 2 crust pie.
Saturday, December 01, 2007

Friday, November 30, 2007
Smoky Black Bean Enchiladas
I don't have a photo of the enchiladas. We ate them too fast. Instead, a little pic of Abby holding hands with daddy while we sing our pre-dinner gratitude song. I tried doing little readings before dinner, but Abby being the musical sort wanted to sing. So, I dug deep into the recesses of my mind and pulled up the old grace songs we sang at camp. Songs like: "In back of the bread is the flour. . . ", "Johnny Appleseed", "Thank you earth." She really likes doing it and I like pausing before we eat. So, even though this is not a picture of the enchiladas, the scene before we ate them was similar.
I love these enchiladas. I don't bother doing two pans and just throw them all into one pan. Sometimes I'll halve the recipe and put it in a brownie pan if it's just the 3 of us. Yum!
Smoky Black Bean Enchiladas
6 Servings
Beans
Mexican
Vegetarian Meatless Bake Main Dish
-- THE FILLING --
1 Chipotle chile in adobo sauce minced
1 tablespoon Olive oil plus extra for greasing
1 medium Onion minced
3 cans (14.5 oz) Black beans drained and rinsed
3/4 cup Orange juice
-- THE SAUCE --
1 cup Salsa (mild or medium)
1 cup Tomato sauce
1 teaspoon Dried oregano
1 teaspoon Ground cumin
12 Corn tortillas
6 ounces Neufchatel (or other light cream cheese) cut into 12 slices
2 cups Monterey jack cheese grated
1. Heat the oil in a medium-sized saucepan over medium heat. Saute the onion and chipotle pepper until soft, about 10 minutes. Stir in the beans and orange juice, and simmer 10 minutes. Using the back of a large spoon, mash half the beans by pressing them against the sides of the pan. Cook the beans a few more minutes, or until the texture of mashed potatoes. Let the beans cool.
2. To make the sauce, combine the salsa, tomato sauce, oregano, and cumin in a bowl.
3. Preheat the oven to 350 degrees.
4. Wrap the tortillas in foil and bake 10 minutes. This will soften them and prevent them from splitting when rolled. Let cool slightly. Keep the oven on.
5. To assemble the enchiladas, lightly oil 2 shallow 2-quart baking dishes, such as 12x2x7-inch Pyrex dishes (you don't want to crowd the enchiladas). Pour a thin film of sauce on the bottom of each dish. Divide the filling in half. Lay six tortillas on a work surface and place 6 spoonfuls of the filling on half of each tortilla. Top with a slice of cream cheese. Roll the enchiladas and place seam side down in the baking dish. Repeat with the remaining 6 tortillas and remaining half of the filling. Pour the sauce all over the enchiladas and sprinkle on the grated cheese. Cover the dishes with foil (the enchiladas can be prepared to this point and refrigerated up to 4 hours in advance; bring to room temperature before baking).
6. Bake, covered, for 25 minutes, or just until hot throughout. Let sit 5 minutes before serving.
Tip: Because the tortillas will absorb a lot of the sauce and become very soft, it's best not to assemble the enchiladas more than 4 hours in advance. If you want to do more advance preparation, prepare all the components separately (up to 2 days in advance) and put the enchiladas together a few hours before cooking.
From Vegetarian Classics by Jeanne Lemlin
 So, even though this is not a picture of the enchiladas, the scene before we ate them was similar.
I love these enchiladas. I don't bother doing two pans and just throw them all into one pan. Sometimes I'll halve the recipe and put it in a brownie pan if it's just the 3 of us. Yum!
Smoky Black Bean Enchiladas
6 Servings
Beans
Mexican
Vegetarian Meatless Bake Main Dish
-- THE FILLING --
1 Chipotle chile in adobo sauce minced
1 tablespoon Olive oil plus extra for greasing
1 medium Onion minced
3 cans (14.5 oz) Black beans drained and rinsed
3/4 cup Orange juice
-- THE SAUCE --
1 cup Salsa (mild or medium)
1 cup Tomato sauce
1 teaspoon Dried oregano
1 teaspoon Ground cumin
12 Corn tortillas
6 ounces Neufchatel (or other light cream cheese) cut into 12 slices
2 cups Monterey jack cheese grated
1. Heat the oil in a medium-sized saucepan over medium heat. Saute the onion and chipotle pepper until soft, about 10 minutes. Stir in the beans and orange juice, and simmer 10 minutes. Using the back of a large spoon, mash half the beans by pressing them against the sides of the pan. Cook the beans a few more minutes, or until the texture of mashed potatoes. Let the beans cool.
2. To make the sauce, combine the salsa, tomato sauce, oregano, and cumin in a bowl.
3. Preheat the oven to 350 degrees.
4. Wrap the tortillas in foil and bake 10 minutes. This will soften them and prevent them from splitting when rolled. Let cool slightly. Keep the oven on.
5. To assemble the enchiladas, lightly oil 2 shallow 2-quart baking dishes, such as 12x2x7-inch Pyrex dishes (you don't want to crowd the enchiladas). Pour a thin film of sauce on the bottom of each dish. Divide the filling in half. Lay six tortillas on a work surface and place 6 spoonfuls of the filling on half of each tortilla. Top with a slice of cream cheese. Roll the enchiladas and place seam side down in the baking dish. Repeat with the remaining 6 tortillas and remaining half of the filling. Pour the sauce all over the enchiladas and sprinkle on the grated cheese. Cover the dishes with foil (the enchiladas can be prepared to this point and refrigerated up to 4 hours in advance; bring to room temperature before baking).
6. Bake, covered, for 25 minutes, or just until hot throughout. Let sit 5 minutes before serving.
Tip: Because the tortillas will absorb a lot of the sauce and become very soft, it's best not to assemble the enchiladas more than 4 hours in advance. If you want to do more advance preparation, prepare all the components separately (up to 2 days in advance) and put the enchiladas together a few hours before cooking.
From Vegetarian Classics by Jeanne Lemlin
Monday, November 26, 2007
It's winter. . . I'm allowed to eat take-out and not take pictures of it
A few items:
1. The newest Barbara Kingsolver book is phenomenal. It will make you want to go out and make cheese. I do. There is a website with all of the recipes from the book and other inspirational bits of info. Check it out here.
2. Comments were left many weeks ago and I wanted to get back to them.
Jess B. said:
Jess is referring to the Pot Pie recipe in the post that she commented on. I have to say that I've heard that Whole Wheat Pastry Flour is a great substitute for white flour. My friend Shannon, over at Pietown has had really great luck just substituting it in cookies and other pastries. I just got some and will experiment with it too. And, well, butter. I suppose it depends on why you want to keep it out of your food and what you are using it for. If it's a dairy thing: you could use a vegan margarine or vegetable shortening. . .the good, non-hydrogenated kind. You might get away with using olive oil in some things. If it's a fat issue, you could try using applesauce to substitute for the fat in cookies and brownies. In the case of the pot pie, I'd offer up the idea of topping it with mashed potatoes and turn it into a shepard's pie of sorts.
And, as soon as Abby heard that kale is "dinosaur food", she ate it all up! Great tips Jess, thanks!
1. The newest Barbara Kingsolver book is phenomenal. It will make you want to go out and make cheese. I do. There is a website with all of the recipes from the book and other inspirational bits of info. Check it out here.
2. Comments were left many weeks ago and I wanted to get back to them.
Jess B. said:
Yum, we will try the filling but not the crust -- any ideas about substitutes for all the butter? We haven't made pie crusts or pastry for a long time because of the white flour-butter issue. But we do have two tips for helping kids embrace "grow" food (our version of strong food): #1) we grow kale and peas in the yard and tell the kids the dinosaurs ate similar food. It worked on them as toddlers, and it works now. They eat it like animals. #2) once our kids found out that beets turn your pee pink, they started eating grated beets and/or steamed beets in quantity. #3) "harvest muffins" made with carrots, zucchini, raisins, etc. Love, Jess B.
Jess is referring to the Pot Pie recipe in the post that she commented on. I have to say that I've heard that Whole Wheat Pastry Flour is a great substitute for white flour. My friend Shannon, over at Pietown has had really great luck just substituting it in cookies and other pastries. I just got some and will experiment with it too. And, well, butter. I suppose it depends on why you want to keep it out of your food and what you are using it for. If it's a dairy thing: you could use a vegan margarine or vegetable shortening. . .the good, non-hydrogenated kind. You might get away with using olive oil in some things. If it's a fat issue, you could try using applesauce to substitute for the fat in cookies and brownies. In the case of the pot pie, I'd offer up the idea of topping it with mashed potatoes and turn it into a shepard's pie of sorts.
And, as soon as Abby heard that kale is "dinosaur food", she ate it all up! Great tips Jess, thanks!
Friday, November 16, 2007
Last minute Thanksgiving ideas!
Here are some great links for good recipes.
Vegetarian Thanksgiving ideas.
More Thanksgiving Ideas
And, the root/squash recipe I'll be making for our family.
Harvest Vegetable Medley
Serving Size : 8
1 pound small brussels sprouts, trimmed
1 butternut squash -- halved, cut into chunks
1 head cauliflower -- separated into 2-inch florets
1 pound fingerling potatoes -- halved
4 medium leeks -- whites only, trimmed and quartered lengthwise
1/2 pound baby carrots -- trimmed
1/2 pound baby parsnips -- peeled and trimmed
24 cloves garlic -- peeled and halved
3 cloves garlic -- minced and divided
4 Tablespoons olive oil -- divided
1 tablespoon fresh sage -- chopped
24 whole sage leaves
1 Tablespoon chopped fresh rosemary
2 small red bell peppers -- quartered
Adjust oven rack to lowest position. Preheat oven to 450ºF. Bring saucepan of water to a boil. Add Brusseles sprouts and cook 3 minutes, or until bright green. Drain, rinse under cold water, then pat dry.
Toss squash, cauliflower, potatoes, leeks, carrots, parsnips, garlic cloves, 3 TBS olive oil, chopped sage, sage leaves, and rosemary in a large roasting pan. Season with salt and pepper, and spread into a single layer. Roast 25 minutes, tossing vegetables twice.
Add bell peppers, Brussels sprouts, minced garlic, and remaining 1 TBS oil. Roast 15 minutes more, or until vegetables are browned on edges and tender. Season with salt and pepper and serve over Chestnut-and-Apple Stuffing. Vegetarian Times Nov./Dec. 2007
Next year when I host, I'll most likely make this:
Chestnut and Apple Stuffing
Serving Size : 12
10 slices whole wheat bread -- cubed
10 slices hearty white bread -- cubed
1 14 oz tube soy "sausage" -- crumbled
1 Tablespoon olive oil
1 large white onion -- chopped
5 ribs celery -- sliced (1 1/2 cups)
4 cloves garlic -- minced
2 tart apples -- peeled and diced
1 cup peeled and ready to eat roasted shestnuts -- halved
1/4 cup chopped fresh sage
1 1/2 cups no-chicken broth
Preheat oven to 325ºF. Spread bread cubes in roasting pan, and bake 10 to 15 minutes, or until toasted.
Coat nonstick skillet with cooking spray and heat over medium-high heat. Add soy sausage, and cook 5 minutes, or until browned. Toss sausage with bread cubes in bowl.
Heat oil in same skillet over medium heat. Add onion, celery, and garlic, and saute 1 minute. Reduce heat to low, cover, and cook 7 minutes more. Stir in apples, chestnuts, and sage. Cover, and cook 5 minutes, or until apples are crisp-tender. Add to bread mixture. Stuffing can be prepared up to this point , sealed in a food storage bag, and refrigerated up to 2 days.
Increase oven heat to 350ºF. Coat 13 x 9 inch baking dish with cooking spray. Toss stuffing mixture with broth, and season with salt and pepper. Spoon into prepared baking dish. Cover with foil and bake 20 minutes. Remove foil and bake 15 minutes more, or until top is browned and crisp.
Vegetarian Thanksgiving ideas.
More Thanksgiving Ideas
And, the root/squash recipe I'll be making for our family.
Harvest Vegetable Medley
Serving Size : 8
1 pound small brussels sprouts, trimmed
1 butternut squash -- halved, cut into chunks
1 head cauliflower -- separated into 2-inch florets
1 pound fingerling potatoes -- halved
4 medium leeks -- whites only, trimmed and quartered lengthwise
1/2 pound baby carrots -- trimmed
1/2 pound baby parsnips -- peeled and trimmed
24 cloves garlic -- peeled and halved
3 cloves garlic -- minced and divided
4 Tablespoons olive oil -- divided
1 tablespoon fresh sage -- chopped
24 whole sage leaves
1 Tablespoon chopped fresh rosemary
2 small red bell peppers -- quartered
Adjust oven rack to lowest position. Preheat oven to 450ºF. Bring saucepan of water to a boil. Add Brusseles sprouts and cook 3 minutes, or until bright green. Drain, rinse under cold water, then pat dry.
Toss squash, cauliflower, potatoes, leeks, carrots, parsnips, garlic cloves, 3 TBS olive oil, chopped sage, sage leaves, and rosemary in a large roasting pan. Season with salt and pepper, and spread into a single layer. Roast 25 minutes, tossing vegetables twice.
Add bell peppers, Brussels sprouts, minced garlic, and remaining 1 TBS oil. Roast 15 minutes more, or until vegetables are browned on edges and tender. Season with salt and pepper and serve over Chestnut-and-Apple Stuffing. Vegetarian Times Nov./Dec. 2007
Next year when I host, I'll most likely make this:
Chestnut and Apple Stuffing
Serving Size : 12
10 slices whole wheat bread -- cubed
10 slices hearty white bread -- cubed
1 14 oz tube soy "sausage" -- crumbled
1 Tablespoon olive oil
1 large white onion -- chopped
5 ribs celery -- sliced (1 1/2 cups)
4 cloves garlic -- minced
2 tart apples -- peeled and diced
1 cup peeled and ready to eat roasted shestnuts -- halved
1/4 cup chopped fresh sage
1 1/2 cups no-chicken broth
Preheat oven to 325ºF. Spread bread cubes in roasting pan, and bake 10 to 15 minutes, or until toasted.
Coat nonstick skillet with cooking spray and heat over medium-high heat. Add soy sausage, and cook 5 minutes, or until browned. Toss sausage with bread cubes in bowl.
Heat oil in same skillet over medium heat. Add onion, celery, and garlic, and saute 1 minute. Reduce heat to low, cover, and cook 7 minutes more. Stir in apples, chestnuts, and sage. Cover, and cook 5 minutes, or until apples are crisp-tender. Add to bread mixture. Stuffing can be prepared up to this point , sealed in a food storage bag, and refrigerated up to 2 days.
Increase oven heat to 350ºF. Coat 13 x 9 inch baking dish with cooking spray. Toss stuffing mixture with broth, and season with salt and pepper. Spoon into prepared baking dish. Cover with foil and bake 20 minutes. Remove foil and bake 15 minutes more, or until top is browned and crisp.
Thursday, November 15, 2007
Pumpkin inspiration and a cranberry crumble
 Edit: I'm adding a picture and putting in my 2 cents worth about a stuffed winter squash. I didn't have the stuff to make Shannon's stuffed pumpkin. Instead, I cut off the top of the squash, smooshed some butter and salt and pepper around in the cavity and chucked a little bit of broth inside, covered it and baked it at 400degrees until it started to get soft-ish. I threw in a mixture of cooked brown rice, raisins and chopped cashews and baked it until the squash was done and the stuffing warm. . ooo my tasty! And it looks so pretty to serve!
No pictures from me today. Shannon over at Pietown made this amazing stuffed pumpkin. I can't wait to try it out, as we have some winter squash sitting around that I can't bring myself to chop and peel to make soup out of. I'm excited.
And, last night, I took a kick butt apple cranberry crumble to our local soup night. A quick word about soup night. Here in a small town, us hippie eater have got to stick together. We're a tight knit, yet very welcoming group. My dear friend Suzanne makes huge vats of soup once a month and everyone gathers there with bread or salad or wine in hand to make a great feast. Last night, I was inspired by another blogger and took over a tree of gratitude. We all made leaves and wrote what we're thankful for on them and decorated the tree until it was full and bright and made me feel good.
So, the cranberry crumble. Abby ate cranberries raw, puckered up her lips and ate another, and another and another until her whole face was red and her fingers stained!
I didn't bother to peel the apples, put it in a pretty pie plate, omitted the nuts and lowered the sugar significantly in both the fruit and the crumble. It was beautiful and I'm sad I didn't get a picture.
Apple Cranberry Crumble Recipe
This recipe is from the Taste of Home Holidays & Celebrations Cookbook.
6
servings 1¼ hours 15 min prep
 1¼ hours
 | 3 | cups chopped peeled apples |
| 2 | cups cranberries (fresh or frozen) |
| 3/4 | cup sugar |
| 1 | cup oats (old-fashioned or quick-cooking) |
| 3/4 | cup packed brown sugar |
| 1/3 | cup all-purpose flour |
| 1/2 | cup butter, melted |
| 1/2 | cup chopped pecans (optional) |
- In a greased 8-in. square baking dish, combine apples and cranberries; sprinkle with sugar.
- In another bowl, combine the oats, brown sugar, flour and butter; sprinkle over cranberry mixture. (Top with pecans if desired.).
- Bake, uncovered, at 350° for 55-60 minutes or until browned and bubbly.
- Best served warm.
Saturday, November 03, 2007
Oh the humanity!
 I took the last of the apples from our tree and made one glorious quart of apple sauce. I took it outside to photograph it and :
 Oh no! Luckily, the farmer's market has apples, so I can buy them up and make more.
 This meal doesn't look nearly as good as it was. I'm putting it here so I remember later.
 Put some chicken thighs in a cast iron skillet, cook them with some oil for a while.
Add a whole mess (like 1/3 cup) of grated ginger, a few cloves of sliced garlic, a bunch of soy sauce and water and poach until the chicken is mostly done. Add carrot slices, cooked brown rice and chopped greens. Keep cooking until everything comes together nicely, the carrots are tender and the greens have shrunk down to size. Serve with soy sauce at the table. Even Abby ate it.
 And, this is a winter cobbler. All manner of roots and tomatoes and lentils in the bottom and biscuits on top. I cut them out with a star cookie cutter hoping that Abby would be excited to eat it with the stars. This picture makes it look like some sort of sea star mass murder. . . it was tasty. I put two recipes together-ish, substituted 1 cup whole wheat flour in the biscuits and used all of the roots I had on hand: potatoes, turnips, carrots, parsnips, onion, garlic. You could put celery root or rutabaga in here. . .yum.
Martha Stewart's recipe is here.
Winter Vegetable Cobbler
From: Classic Vegetarian Recipes
Serves 4
1 T. olive oil
1 garlic clove, crushed
8 small onions, halved
2 celery stalks, sliced
9 ounces rutabaga, chopped
2 carrots, sliced
½ small cauliflower, broken into florets
9 ounces mushrooms, sliced
14 ounce can chopped tomatoes
¼ cup red lentils
2 T cornstarch
3-4 T water
1 ¼ cups vegetable stock
2 t
2 t chopped fresh oregano or parsley
Sprigs of oregano to garnish
Cobbler Topping:
2 cups self-rising flour
¼ cup butter
1 cup grated cheddar
2 t chopped fresh oregano or parsley
1 egg, beaten
2/3 cup skimmed milk
Salt
- fry onions and garlic for 5 minutes. Add celery, rutabaga, carrots and cauliflower and fry 2-3 more min.
- Remove pan from heat and add, mushrooms, tomatoes and lentils. Mix the cornstarch with water and add to the pan with stock,
- To make topping, sift the flour and a pinch of salt into a bowl. Rub in the butter, then stir in most of the cheese and herbs. Beat the egg and mix and add enough to the dry ingredients to make a dough. Knead and roll to ½ inch thick. Cut into 2 inch rounds. Remove casserole from oven and increase the temp to 400 degrees. Arrange the rounds around the edge of the dish, brush with the egg and milk and sprinkle with cheese. Cook 10-12 min. Garnish and serve.
Thursday, November 01, 2007
Turn, Turn, Turn


 "To every thing there is a season, and a time for every purpose. . . "
And so, another season is over. Daylight savings ends this weekend. It's time to warm up some of those soups that you all froze earlier in the season and enjoy our last share from our wonderful community sponsored agriculture farm! A big thanks to Farmers Doug, Lee and Hannah and all of the great farm members, interns and volunteers for our wonderful food.
There were some great comments on the blog on last week's entry. Thanks to all who spent the time to share your thoughts. I did a very random drawing and pulled Jess B's name out of the hat. So, Jess. . .you won the big fat vegetarian cookbook. I'll leave it at the drop site for you!
And now, how will we fare over the winter without our beloved farm shares? Remember to go to the farmer's market on Saturdays, clean out your freezers and check back here to find yummy recipes.
Winter Squash ideas: If you're like me, you have a stash of winter squash and roots around. Winter squash are great for roasting with your roots. There's a great roasted root soup recipe here. You can make soups by following this recipe and substituting other winter squashes for the butternut or maybe pear for the apple. This is a favorite soup in our house that marks autumn for us. I cut it out of a neighborhood newspaper in Seattle years ago, so I don't have the author to credit.
Have a wonderful winter!
Butternut Squash and Curried Apple Soup
4 Tbl. Butter
2 cups chopped sweet onion
1 Tbl. curry
1 butternut squash (~ 1.5 lbs or more for a thicker soup)
2 tart green apples, peeled, seeded and chopped
3 cups vegetable broth
1.5 tsp. hot pepper sauce (tabasco)
1 tsp. salt
1/4 tsp. each marjoram, rosemary
1 cup apple juice (or to taste)
salt and pepper
sour cream and apple slices for garnish
1 Melt butter in stockpot, add onions and curry. Cover and cook over low until onions are tender, about 20 min.
2 Add squash, apples, broth, hot pepper sauce, salt, marjoram, and rosemary. Bring to a boil. Reduce heat and simmer, partially covered, until squash and apple are tender, about 25 min.
3 Using a potato masher, mash soup to the consistency that you’d like. Alternatively, blend soup in batches in a food processor or blender and return soup to stock pot.
4 Add apple juice and heat through. Season to taste with salt and pepper, and garnish with a dollop of sour cream and apple slices if desired.
Makes about 6 servings
Tuesday, October 23, 2007
All American Pot Pie
I have to admit that I just plain cut and pasted this recipe, including the pictures, from a different blog. I wanted to use this recipe for this week's post, but didn't want to type it all out. A wee google search led me to this fabulous entry. However, the other blog didn't credit the author of the recipe. I will. I will also include my notes in italics. It's a mighty tasty way to use a ton 'o veggies and have a really filling meal. There's no reason why this has to stay vegetarian, cooked chicken chunks would be a wonderful addition. I like to make the dough ahead of time so it can chill while I'm making the filling.
All American Pot Pie from Vegetarian Planet by Didi Emmons.
Filling:
1/2 T butter
4 C total of any of the following veggies: corn, carrot, red bell pepper, zucchini, spinach leaves (firmly packed), sliced onions, potato...(left over roasted winter squash chunks, mushrooms, summer squash, parsnips from last week's share, even beets would be tasty).
1 small garlic clove, minced
3 T flour
1 C warm milk
1 pinch fresh or dried thyme
3/4 t salt
black pepper to taste Melt the butter in a skillet. Saute the vegetables for five minutes, stirring often. Add the garlic, saute for five minutes more. Sprinkle three tablespoons flour over the veggies and stir over the heat for two more minutes. Add the warm milk slowly, stirring all the while to avoid lumps. Stir in the thyme. Bring the sauce to a simmer and cook it until the it thickens. Continue to cook until the vegetables are tender. Add one-fourth teaspoon of salt and plenty of pepper. Put into a 9 or 10 inch casserole or deep pie dish. (At this point you can cover the dish and chill it for up to 2 days, if you'd like to bake it later).
 The Dough:
(the recipe originally calls for twice as much dough as is written here. I have to agree that it was too much, so I'll leave the modified amounts here).
1/4 Cup (1/2 stick) cold butter
3/4 cups flour
1/4 t salt
Cut a half-stick of cold butter into three-fourths cups of flour and one-fourth teaspoon of salt (cut the butter until the pieces are no larger than a pea). Add two tablespoons of ice water and stir to incorporate all the flour. Add more water or flour as necessary to make a soft moist dough. Work it in the palm of your hand on a hard surface. Form it into a flattened ball. Chill the dough for thirty minutes.
Roll the dough into a circle slightly larger than the diameter of the casserole dish. Place it on top and pinch the rim so it clings to the dish. Cut four one-inch long slits in the dough.
Bake at 400 degrees for about twenty minutes, or until the filling is bubbling and the crust golden. (I like to bake it on top of a cookie sheet to catch any spills. ..and there will be spills). Serve and enjoy!

For those of you who are members of the Salt Creek Farm CSA: Don't forget to comment to this entry so I can do a drawing for an end of the season gift. Sorry to all of you who aren't here in Port Angeles, the prize is a huge book and I can't mail it. . . so just locals this time!
All American Pot Pie from Vegetarian Planet by Didi Emmons.
Filling:
1/2 T butter
4 C total of any of the following veggies: corn, carrot, red bell pepper, zucchini, spinach leaves (firmly packed), sliced onions, potato...(left over roasted winter squash chunks, mushrooms, summer squash, parsnips from last week's share, even beets would be tasty).
1 small garlic clove, minced
3 T flour
1 C warm milk
1 pinch fresh or dried thyme
3/4 t salt
black pepper to taste

 The Dough:
1/4 Cup (1/2 stick) cold butter
3/4 cups flour
1/4 t salt
Cut a half-stick of cold butter into three-fourths cups of flour and one-fourth teaspoon of salt (cut the butter until the pieces are no larger than a pea). Add two tablespoons of ice water and stir to incorporate all the flour. Add more water or flour as necessary to make a soft moist dough. Work it in the palm of your hand on a hard surface. Form it into a flattened ball. Chill the dough for thirty minutes.
Roll the dough into a circle slightly larger than the diameter of the casserole dish. Place it on top and pinch the rim so it clings to the dish. Cut four one-inch long slits in the dough.
Bake at 400 degrees for about twenty minutes, or until the filling is bubbling and the crust golden. (I like to bake it on top of a cookie sheet to catch any spills. ..and there will be spills). Serve and enjoy!

For those of you who are members of the Salt Creek Farm CSA: Don't forget to comment to this entry so I can do a drawing for an end of the season gift. Sorry to all of you who aren't here in Port Angeles, the prize is a huge book and I can't mail it. . . so just locals this time!
Sunday, October 21, 2007
Food ingredients to avoid
 I've wanted a little pocket guide for food ingredients to avoid for a long time. I finally made one and decided to put it here for you to enjoy too. Print it out and fold it in half long ways (hot dog way . . . you'll know what I mean if you have kids) and put it in your wallet, purse or pocket. Most of these are "no-brainers", but the list of other things MSG is listed as is handy. Of course, the best way to avoid all of this crap is to buy whole foods (no, not the grocery store, I mean actual foods that are whole) and make your own snacks etc. But, I know that it's a busy world and we can't always avoid EVERY processed food out there. It's also a great list to use as a starting point when working with the schools to change their lunch program.
You can either copy and print the picture file above or click on the PDF file below to download it. This method will make a more clear image for you.
Enjoy!
Delicata
 Delicata squash is an unsung hero. People think that all winter squashes are the same: stringy, messy, hard to peel. I had no idea what to do with delicata when I first saw it, but it's easy: cut off the ends, cut in half long ways, scoop out the seeds, cut half moons with the skin on, fry in olive oil and dip in some yogurt sauce. . . sweet goodness.
Tuesday, October 16, 2007
Deceptively Delicious
 (Photo by Scott Robinson via Flickr)
This fabulous recipe is a go to favorite for crazy week nights. I use flat breads or whole wheat pita bread to make these. You can substitute beet greens or kale or steamed chard for the spinach. It is from the book Vegetarian Planet by Didi Emmons. I found the recipe all typed up and pretty on-line at this great CSA website that has lots of other things to check out too.
Spinach and Mozzarella Grilled Cheese Sandwiches with
Sandwiches:
6 ounces fresh spinach (large stems removed)
2 fresh pieces of lavash bread, or 1 large split pita pocket
2 plum tomatoes, cut in half lengthwse, then sliced crosswise
2 ounces mozzarella cheese, grated (or sliced, if it's fresh mozzarella)
Chili Dipping Sauce:
1 teaspoon hot chili sauce
2 tablespoons mayonnaise
2 tablespoons plain whole, low-fat, or nonfat yogurt, or nonfat sour cream
1 teaspoon Dijon mustard
2 teaspoons apple cider vinegar
Make the dipping sauce: in small bowl, combine the chili sauce with the mayonnaise, yogurt, mustard, cider vinegar and garlic. Stir well.
Steam the spinach over high heat for 2 minutes. Let the spinach cool.
Lay one of the pieces of lavash or pita on your work surface, with a short side of the bread directly in front of you if you are using lavash. Lay half the tomatoes across the bread, about 3 inches from the side closest to you. Squeeze any excess water from the spinach, then lay half of it on the tomatoes. Sprinkle or lay half the mozzarella on top of the tomatoes and spinach. Sprinkle with salt and pepper to taste. Then roll the bread, starting with the side closest to you, as tightly as possible. Follow the same procedure for the second sandwich. (For pita pocket, fill in same order.)
Heat the olive oil in a large (preferably non-stick) skillet over medium heat. Place the two rolled sandwiches (or pita pocket) in the skillet, and place another skillet on top to weigh the sandwiches down. Cook the sandwiches for about 4 minutes or until they are golden brown, then turn them and cook the other side for 4 more minutes, checking the undersides frequently. Cut in half and serve with a small bowl of the dipping sauce.
(edited to add Lee's Kohlrabi recipe from the paper crop sheet!).
Soy Sauce Vegetables
(This resembles the little pickled side dishes served at Japanese cafes)
2 cups any firm vegetables-turnip, daikon, kohlrabi, carrots, beets and so on
1/2 teaspoon salt
2 teaspoons sugar
mild soy sauce
Cut vegetables along the grain into julienne strips. Put them in a large jar with a lid. Add salt and sugar and shake well so that vegetables are coated. Let stand at room temperature for at least an hour or up to overnight.
Pour in enough soy sauce to cover vegetables. Press down to get rid of air pockets and let stand at room temperature for a day. Drain off soy sauce. (it can be reused for pickling or cooking). The vegetables will keep indefinitely in the refrigerator.
MAKES 2 CUPS
Recipe Maven Musings
Well, you all had great responses to my ravings, I mean musings last time. Thanks so much for your comments. Barbara Blackie sent me this link to a really great New York Times article that addresses almost the exact issue I was talking about last time: picky kid eaters. The highlight of the article, to me, was the point that little kids between ages 2-5 are prone to picky eating and that it's okay. From the article: "It’s an evolutionary response, researchers believe. Toddlers’ taste buds shut down at about the time they start walking, giving them more control over what they eat. “If we just went running out of the cave as little cave babies and stuck anything in our mouths, that would have been potentially very dangerous,” Dr. Cooke said." This makes a whole lot of sense to me and gives me hope that Abby will someday take a bite of chard and dig it. The article also does a mini-review of Deceptively Delicious written by Jerry Seinfeld's wife. This is another book that has mom's grinding up the good stuff to hide it from their kids. This method gets the "strong food" into the kids, but it doesn't teach them to like it or understand it.
Interestingly, the day after sending out the last cropsheet, I caught wind of the 2 Angry Moms movement. This is a documentary that follows two mothers as they attempt to change what's in their children's school lunches. The movie is wonderful and the idea of trying to change things here is even more wonderful. Even if you don't have children, your tax dollars pay for the crud that gets served to the children of our community. And, eventually, we'll all have to pay for the health care costs of the next generation from eating High Fructose Corn Syrup, Hydrogenated Fats and MSG (among other nasties). The sound bite that struck me the most from this movie is that the current generation of children are the first ever to have a shorter life expectancy than their parents. Shocking. Now, if that isn't reason enough to start fighting for change locally, I don't know what is. To get involved and see the film, go to the Port Angeles Public Library Saturday October 27th at 3pm or Monday Oct. 29th at 6:30pm.
Whirled Peas Cookies
 Okay, my propensity to making food that looks a little like piles of pooh is getting out of hand. But these World Peace Cookies are so tasty it hurts a little bit. I found them by way of pietown (Hi Shannon!) and enjoyed them oh so much. I couldn't find "fleur de sel" here in this little town, so "flower of bali salt" did just fine as a replacement. As long as you don't use a smoky or spicy salt, I imagine it would be alright. This recipe made about 2 dozen and, as you can see, two days later, there's only 4 left.
World Peace Cookies, or Korovas, from Baking From My Home to Yours, by Dorie Greenspan
- 1 1/4 cups flour
- 1/3 cup cocoa powder
- 1/2 tsp baking soda
- 11 Tbsp butter at room temperature
- 2/3 cup light brown sugar
- 1/4 cup sugar
- 1/2 tsp fleur de sel
- 1 tsp vanilla
- 5 ounces chopped bittersweet chocolate (I used really dark chocolate)
Mix together flour, cocoa and baking soda.
Beat butter until soft, then add sugars, salt and vanilla. Beat for 2 minutes. Add dry ingredients and mix slowly until just combined; mix in chocolate. Do not overmix this dough. Divide dough into two portions, and form into logs of 1 1/2 inch diameter. Chill in refrigerator for at least 3 hours.
Preheat oven to 325 degrees and line baking sheet with parchment. Slice dough into 1/2" thick cookies, squishing back on any bits of dough that fall off (the dough is crumbly). Bake for exactly 12 minutes even though cookies will look underdone, and cool on baking sheet on wire rack.
No Knead Bread

I've been making the infamous no knead bread for a long while, but haven't posted the recipe. I LOVE this bread. It is infinitely satisfying. It is tasty and chewy and crunchy on the outside. It is better than most breads I've ever eaten and I made it. It's that good, and that easy.
Over the year that I've been making this bread, I've made a few tweaks:
I like replacing a cup of the flour with whole wheat.
I add dried or fresh rosemary at the beginning.
I like to use wheat bran.
I bake it in the ceramic insert from my big crock pot. Other people have gone crazy buying up fancy $100 le creuset pots, but I think it's just not necessary.
I've heard of great success adding cheeses and olives and other stuff after the first, long rising.
This bakes up great even after rising in our cold drafty old house. I thought it wouldn't be warm enough here, and it does just fine.
Here then, the recipe:
Recipe: No-Knead Bread
Adapted from Jim Lahey, Sullivan Street Bakery
Time: About 1½ hours plus 14 to 20 hours’ rising
3 cups all-purpose or bread flour, more for dusting
¼ teaspoon instant yeast
1¼ teaspoons salt
Cornmeal or wheat bran as needed.
1. In a large bowl combine flour, yeast and salt. Add 1 5/8 cups water, and stir until blended; dough will be shaggy and sticky. Cover bowl with plastic wrap. Let dough rest at least 12 hours, preferably about 18, at warm room temperature, about 70 degrees.
2. Dough is ready when its surface is dotted with bubbles. Lightly flour a work surface and place dough on it; sprinkle it with a little more flour and fold it over on itself once or twice. Cover loosely with plastic wrap and let rest about 15 minutes.
3. Using just enough flour to keep dough from sticking to work surface or to your fingers, gently and quickly shape dough into a ball. Generously coat a cotton towel (not terry cloth) with flour, wheat bran or cornmeal; put dough seam side down on towel and dust with more flour, bran or cornmeal. Cover with another cotton towel and let rise for about 2 hours. When it is ready, dough will be more than double in size and will not readily spring back when poked with a finger.
4. At least a half-hour before dough is ready, heat oven to 450 degrees. Put a 6- to 8-quart heavy covered pot (cast iron, enamel, Pyrex or ceramic) in oven as it heats. When dough is ready, carefully remove pot from oven. Slide your hand under towel and turn dough over into pot, seam side up; it may look like a mess, but that is O.K. Shake pan once or twice if dough is unevenly distributed; it will straighten out as it bakes. Cover with lid and bake 30 minutes, then remove lid and bake another 15 to 30 minutes, until loaf is beautifully browned. Cool on a rack.
Yield: One 1½-pound loaf.
Thursday, October 04, 2007
Sneaky Food
So, it's a month or so into school. I imagine that some of you are starting to lose that feeling of excitement and new-ness in packing lunch every day. Last fall, I did a little musing about how to pack more healthy lunches. You can find it here. This fall, I'm thinking a few words on getting kids to eat the good stuff are in order. A farm member family I know talks about "strong food" to their son. I thought this was a good description of all the stuff I'm trying to get my kiddo to eat and started using this term too. It didn't take long before Abby started saying, "no strong food mama, I want snack food." So, we struggle along, trying to get the kid to eat something other than cheese, whole wheat tortillas and peanut butter (not necessarily together).
There's a new-ish book on the market called The Sneaky Chef. The basic premise of the book is to sneak "strong food" into foods your kids will eat. There's a lot of puree-ing involved and making sure you don't put green food in something that's not green (like, no spinach in macaroni and cheese, they'll find it and refuse to eat it) and the like. I'm torn about this idea. I want Abby to know what spinach is, what it looks like, how and where it's grown. I also want her to eat it. Right now, unless it's drown in ranch dressing or hidden in a smoothie, she's just not that into spinach. . .or lots of other strong foods. So, I'm sneaking it into the raviolis that she likes or dicing it into meatballs.
Abby's much more likely to eat something if she helped prepare it or helped put the vegetable into the bag at the farm share drop site. She's learning what kale is and that cauliflower and potatoes can come in a purple variety. Someday we'll get her to appreciate eating the good stuff on it's own, but in the mean time, a little sneaky food will get us through! If you have hot tips on getting kids to eat "strong food" drop me a line and I'll include it in next week's cropsheet.
 Here's a not so sneaky food recipe that Abby digs. As always, I threw in some extra veggies and reduced the spice by about half so Abby would eat it. Corn, zucchini, fresh tomatoes and homemade broth made the refrigerator emptier and me happier. I didn't bother blending this one and it made a hearty stew that's good with quesadillas or plain tortillas. Warning: this is one of those soup recipes that takes half a day to make. Don't start it at 4pm hoping to eat by 5:30. . . not that I have any personal experience in this or anything. . .
Smokey Black Bean and Vegetable Soup
1 (7 ounce) can chipotle chiles in adobo sauce (you only use part of this can and you can freeze the rest to use later)
Cooking spray (or some olive oil)
2 cups coarsely chopped onion
1 cup chopped carrot
3/4/ cup thinly sliced celery
4 garlic cloves, minced
2 teaspoons ground cumin
2 teaspoons dried basil
1 teaspoon dried oregano
1 teaspoon chili powder
2 bay leaves
2 cups water
3 (15-ounce) cans black beans, rinsed and drained
2 (14.5 ounce) cans vegetable broth
2 (14.5 ounce) cans no-salt added plum tomatoes, undrained and chopped
1/2 cup plain nonfat yogurt
1/4 cup chopped fresh cilantro
8 lime wedges
1. Remove 2 chiles from can; reserve remaining chiles and sauce for another use. Finely chop chiles. Heat a large Dutch oven coated with cooking spray over medium-high heat. Add onion, carrot, celery, and garlic; saute 8 minutes or until onion and carrot are tender. Stir in chiles, cumin, basil, oregano, chili powder, and bay leaves; cook 1 minute, stirring constantly. Stir in water, beans, broth and tomatoes; bring to a boil. Partially cover, reduce heat, and simmer 2 hours, stirring occasionally.
2. Remove from heat; discard bay leaves. Place 3 cups of soup mixture in a blender. Let stand 5 minutes; process until smooth. Return pureed mixture to pan, stirring to combine. Ladle 1 1/4 cups soup into each of 8 bowls; top each serving with 1 tablespoon yogurt and 1 1/2 teaspoons cilantro. Serve with lime wedges. Yield: 8 servings
There's a new-ish book on the market called The Sneaky Chef. The basic premise of the book is to sneak "strong food" into foods your kids will eat. There's a lot of puree-ing involved and making sure you don't put green food in something that's not green (like, no spinach in macaroni and cheese, they'll find it and refuse to eat it) and the like. I'm torn about this idea. I want Abby to know what spinach is, what it looks like, how and where it's grown. I also want her to eat it. Right now, unless it's drown in ranch dressing or hidden in a smoothie, she's just not that into spinach. . .or lots of other strong foods. So, I'm sneaking it into the raviolis that she likes or dicing it into meatballs.
Abby's much more likely to eat something if she helped prepare it or helped put the vegetable into the bag at the farm share drop site. She's learning what kale is and that cauliflower and potatoes can come in a purple variety. Someday we'll get her to appreciate eating the good stuff on it's own, but in the mean time, a little sneaky food will get us through! If you have hot tips on getting kids to eat "strong food" drop me a line and I'll include it in next week's cropsheet.
 Here's a not so sneaky food recipe that Abby digs. As always, I threw in some extra veggies and reduced the spice by about half so Abby would eat it. Corn, zucchini, fresh tomatoes and homemade broth made the refrigerator emptier and me happier. I didn't bother blending this one and it made a hearty stew that's good with quesadillas or plain tortillas. Warning: this is one of those soup recipes that takes half a day to make. Don't start it at 4pm hoping to eat by 5:30. . . not that I have any personal experience in this or anything. . .
Smokey Black Bean and Vegetable Soup
1 (7 ounce) can chipotle chiles in adobo sauce (you only use part of this can and you can freeze the rest to use later)
Cooking spray (or some olive oil)
2 cups coarsely chopped onion
1 cup chopped carrot
3/4/ cup thinly sliced celery
4 garlic cloves, minced
2 teaspoons ground cumin
2 teaspoons dried basil
1 teaspoon dried oregano
1 teaspoon chili powder
2 bay leaves
2 cups water
3 (15-ounce) cans black beans, rinsed and drained
2 (14.5 ounce) cans vegetable broth
2 (14.5 ounce) cans no-salt added plum tomatoes, undrained and chopped
1/2 cup plain nonfat yogurt
1/4 cup chopped fresh cilantro
8 lime wedges
1. Remove 2 chiles from can; reserve remaining chiles and sauce for another use. Finely chop chiles. Heat a large Dutch oven coated with cooking spray over medium-high heat. Add onion, carrot, celery, and garlic; saute 8 minutes or until onion and carrot are tender. Stir in chiles, cumin, basil, oregano, chili powder, and bay leaves; cook 1 minute, stirring constantly. Stir in water, beans, broth and tomatoes; bring to a boil. Partially cover, reduce heat, and simmer 2 hours, stirring occasionally.
2. Remove from heat; discard bay leaves. Place 3 cups of soup mixture in a blender. Let stand 5 minutes; process until smooth. Return pureed mixture to pan, stirring to combine. Ladle 1 1/4 cups soup into each of 8 bowls; top each serving with 1 tablespoon yogurt and 1 1/2 teaspoons cilantro. Serve with lime wedges. Yield: 8 servings
Nutritional Information
CALORIES 162(6% from fat); FAT 1g (sat 0.1g,mono 0.1g,poly 0.1g); PROTEIN 10.1g; CHOLESTEROL 0.0mg; CALCIUM 145mg; SODIUM 740mg; FIBER 10.9g; IRON 3.8mg; CARBOHYDRATE 36.9g
Cooking Light, JANUARY 2003
Thursday, September 27, 2007
Zucchini Pie
 (Image courtesy of: Scripps Howard News Service).
I do my best to try all of the recipes before I post them here, and I try to offer recipes that are a little more "fresh" than this one. This week, I'm just plain slammed. So, here then, a zucchini recipe I have not tried. It's a very popular American way to use up a lot of Zucchini. If you're interested in how to make your own "bisquick", check out the recipe below. Some time, I'll experiment with making a baking mix that does not have hydrogenated fats in it. If anyone makes "bisquick" using a shortening that is non-hydrogenated, I'd be curious how it goes.
Happy Zucchini!
Edited to include Lee's comments from the paper cropsheet:
(Lee's two cents: I have made biscuit mix by following a baking powder biscuit recipe and just leaving out the eggs and milk. I used canola oil, which I crumbled into the dry ingredients using my hands. It worked fine, but the refrigerator might be the best bet for long term storage. Be aware that you can chop almost any of the veggies in your crate, especially the greens, into the biscuit dough and a simple biscuit can seem like a gourmet treat! Grate some cheese in, and it almost becomes a meal in itself. ) Lee
Ingredients
- 3 medium zucchini, diced
- 1 onion, chopped
- 4 eggs, beaten
- 1 cup baking mix (such as Bisquick)
- 1/2 cup + 1 Tbs olive oil
- 1/4 cup Parmesan cheese, grated
- 1/4 cup mozarella cheese, grated
- 1 tsp marjoram (1/3 tsp dried marjoram)
- 1 tsp basil (1/3 tsp dried basil)
- black pepper, freshly ground
Directions
- Heat 1 Tbs olive oil over medium high heat in a medium size skillet.
- Cook the onion until it just turns gold.
- In a bowl combine the zucchini, onion, eggs, baking mix, olive oil, cheese, marjoram, basil, and pepper.
- Coat a 10x6" pan or a 12" pie pan with oil.
- Spread the zucchini mixture into the baking dish.
- Bake at 350F for 30 minutes, or until lightly brown.
Make your Own "Bisquick"
4 ½ c sifted flour
2 Tbsp sugar
1 Tbsp + 1 ½ tsp baking powder
1 c shortening
½ tsp salt
2/3 c powdered milk
Stir together flour, baking powder, salt, and sugar. Sift together 2-3 times in a large bowl. Cut in shortening with pastry blender or two knives until the mixture is similar to cornmeal. Add dry milk. Use in recipes that call for Bisquick or all-purpose mix.
Wednesday, September 26, 2007
Apple Phyllo Tart
This picture makes it look like a pile of pooh. I assure you, it's not. It's quite tasty. I just can't take pictures of food to save my life. I promise, I won't put anything on this blog that is not tasty. You might have to squint a little to imagine how tasty it would be from my pictures. . . that's just how it will have to be until I find time to use my camera better or get a better camera.
I like to make a dessert with phyllo when I make my greek greens pie. This one fit the bill. Tasty, sweet, but not overly sickeningly sweet. A keeper. . . the recipe, not the tart. Eat the tart. Right now! Go!

I like to make a dessert with phyllo when I make my greek greens pie. This one fit the bill. Tasty, sweet, but not overly sickeningly sweet. A keeper. . . the recipe, not the tart. Eat the tart. Right now! Go!
Apple Phyllo (Filo) Tart Recipe
By Sarah Phillips
Serves 12
2 large golden delicious apples, peeled and cored and cut into 1/2-inch slices
2 TBSP dark brown sugar
1 teaspoon fresh lemon juice
1/2 teaspoon ground cinnamon
Canola Oil spray or 3 TBSP melted butter, cooled to tepid
Eight 12x17 inch sheets phyllo (filo) dough thawed overnight (available from the grocery store)
- Position a rack in the center of the oven and preheat to 375 degrees F. Lightly spray a nonstick baking sheet with canola oil or cover with parchment paper.
- To make the filling, in a medium bowl, toss the apple slices, brown sugar, lemon juice and cinnamon. Set aside.
- Place 1 sheet of filo dough on a prepared baking sheet and very lightly spray it with canola oil (or you can brush with melted butter). Top with the other filo sheets, lightly spraying each sheet with oil (or brush with melted butter), and progressively arranging the sheets across each other at angles to form a sunburst pattern. Mound the apple filling in the center. Bring up the filo sheets to completely cover the filling. Spray the top of the filo with oil (or brush with butter).
- Bake until the filo is deep golden brown, about 35 minutes. Cool on the baking sheet on a wire cake rack for 10 minutes. Slide the tart on a serving platter. Serve warm.
The Healthy Oven Baking Book, by Sarah Phillips, Doubleday, 1999
Sunday, September 16, 2007
Summer Minestrone Soup
I love this soup. It's a great way to empty the refrigerator at this time of year and it's super tasty too. I used this recipe as a starting point, but added lots more stock and veggies. I put in a can of organic garbanzos and a can of kidney beans for some added protein. It made about 5 quarts, plus a bit. Give some to your neighbors.
 Summer Minestrone – Recipe Page 123
The fullness of my fridge at this time of year makes me both wonder and panic. How amazing to have such great bounty right here in our little town. How the heck do I use it all up!? Right now, my family is not eating a ton of food, so trying to figure out how to make it through the share each week has sent me whirling. I stumbled upon this great article in the Oregonian online that got me working on small batch preserving. I get overwhelmed when I think about doing a big canning day. It's a lot to manage by yourself. Especially with a little one running around. So, one option is to can with friends, or you can take on a couple of different tactics.
Lee's resource for canning from last week's farm news is great too. You can get to it here.
I love the idea of doing a dinner or soup swap. Maybe someone will organize one for us here (not it!). The jist is this: A bunch of people gather and bring 6 or so quarts of frozen soup or frozen containers of dinner or whatever. Then, you all draw numbers and pick items so that you go home with 6 items. That way you can make a whole lot of one thing and then not have to eat it for 2 weeks
Mom's Fridge Pickles
Makes about 1 quart
1 cup white vinegar
1/4 cup sugar
1 TBS sea salt
1/2 tsp. freshly ground black pepper
6 whole cloves
2 bay leaves
1 tsp. crushed red pepper flakes
1 tsp. dill seed
4 to 5 small kirby cucumbers, peeled in stripes and cut into 1/8 inch thick slices
1 small white onion, thinly sliced into rounds
1. Combine the vinegar, sugar, salt, pepper flakes, and dill seed in a quart jar. Place the lid on the jar and shake until the sugar has dissolved.
2. Layer the cucumbers and the onions in the jar using a wooden spoon to press them tightly into the jar, shake it well, and refrigerate it at least 4 hours, shaking the jar occasionally to keep the ingredients mixed. These pickles will keep in the refrigerator for at least 1 month.
From Fresh Every Day by Sara Foster
 Summer Minestrone – Recipe Page 123
 Adapted from The Tomato Festival Cookbook, by
Simple Solution
Ah, the bounty of summer! Gardens overflow with tomatoes, zucchini, summer squash, peppers, and dark leafy greens. Who can resist them? But sometimes it can be hard to figure out what to do with all of them! Well, this lovely soup is a perfect way to use those lively colors, flavors, and textures.
Fragrant with herbs and bursting with nourishment from the good earth, you can make this one-pot meal in advance (during those cooler morning hours) or even freeze it. Either way, Summer Minestrone is a favorite with both kids and adults, a key player in the Mediterranean diet and lifestyle.
INGREDIENTS
2 tablespoons extra-virgin olive oil
1 or 2 cloves garlic, finely chopped
1 medium carrot, cut into 1/2-inch rounds
1 10-inch stalk celery, coarsely chopped
4 cups (about 12 to 15 large) chopped ripe plum tomatoes
4 to 6 cups vegetable broth
1 teaspoon chopped fresh oregano
1 teaspoon fresh thyme
1 stem basil, plus extra sprigs for garnish
salt and freshly-ground black pepper
1 cup (4 ounces) penne, elbow macaroni, small shells, or other medium-sized pasta
12 green beans, washed, trimmed, and cut into 1-inch pieces
1 medium green or yellow bell pepper, seeded and cut into 2-inch by 1/4-inch strips
1 medium leek, washed, white and tender green parts cut into 1/2-inch pieces
8 stems Swiss chard, stalks and leaves cut into 1-inch strips
1 medium zucchini, sliced
1 medium yellow summer squash, sliced
1. In a large saucepan over medium heat, warm the oil and stir in the garlic. Let it soften for a couple of minutes, then stir in the carrot and celery. Cook for 2 minutes. Add the tomatoes, 4 cups of the broth, oregano, thyme, basil, and salt and pepper to taste. Stir. Cover the pan, bring to a simmer, and simmer for 10 minutes.
2. Increase the heat and bring the soup to a brisk boil over high heat. Stir in the pasta, followed by the green beans, bell pepper, and leek. Cook briskly, stirring often, for 3 minutes.
3. Reduce the heat so the soup is simmering and add the chard, zucchini, and summer squash. If the mixture is very thick, or if you would simply like it thinner, add some or all of the remaining broth. Return to a simmer and cover the pan. Continue cooking the soup for 5 minutes, or until the pasta and the vegetables are tender. Serve immediately, or cool and reheat as needed. Garnish with basil leaves. Check for seasoning before serving and add more salt and pepper to taste if necessary.
Serves 4 to 8.
The fullness of my fridge at this time of year makes me both wonder and panic. How amazing to have such great bounty right here in our little town. How the heck do I use it all up!? Right now, my family is not eating a ton of food, so trying to figure out how to make it through the share each week has sent me whirling. I stumbled upon this great article in the Oregonian online that got me working on small batch preserving. I get overwhelmed when I think about doing a big canning day. It's a lot to manage by yourself. Especially with a little one running around. So, one option is to can with friends, or you can take on a couple of different tactics.
- Freeze stuff. Right now, I have a ton of summer squash that I plan to grate and freeze. Later in the winter, I can add it to soups or thaw it, squeeze it dry and make bread with it. I also make a lot of soups and freeze them too.
- Pickle stuff. I do refrigerator pickles, because we eat them fast enough that I can keep adding cucumbers to the brine for a month or so (recipe follows).
- Small batch canning. Put a pot of water on while you're cooking dinner and can a couple of jars of jam or tomatoes while the stove top's on and you're in the kitchen anyway.

- Dehydrate. I love to do apples this way and then we can crunch our way through the crop from our apple tree all year! Abby loves to crank the apple machine (it peels, cores and slices as you turn the crank). We found ours at goodwill for $4 and it's been worth it, plus it's fun.

Lee's resource for canning from last week's farm news is great too. You can get to it here.
I love the idea of doing a dinner or soup swap. Maybe someone will organize one for us here (not it!). The jist is this: A bunch of people gather and bring 6 or so quarts of frozen soup or frozen containers of dinner or whatever. Then, you all draw numbers and pick items so that you go home with 6 items. That way you can make a whole lot of one thing and then not have to eat it for 2 weeks
Mom's Fridge Pickles
Makes about 1 quart
1 cup white vinegar
1/4 cup sugar
1 TBS sea salt
1/2 tsp. freshly ground black pepper
6 whole cloves
2 bay leaves
1 tsp. crushed red pepper flakes
1 tsp. dill seed
4 to 5 small kirby cucumbers, peeled in stripes and cut into 1/8 inch thick slices
1 small white onion, thinly sliced into rounds
1. Combine the vinegar, sugar, salt, pepper flakes, and dill seed in a quart jar. Place the lid on the jar and shake until the sugar has dissolved.
2. Layer the cucumbers and the onions in the jar using a wooden spoon to press them tightly into the jar, shake it well, and refrigerate it at least 4 hours, shaking the jar occasionally to keep the ingredients mixed. These pickles will keep in the refrigerator for at least 1 month.
From Fresh Every Day by Sara Foster
Saturday, September 08, 2007
Simple Late Summer Meal


Cook some pasta.
Melt some butter in a pan.
Add chopped garlic, leek and bell pepper.
Add a chopped tomato once the other stuff is a bit soft.
Add chopped summer squash.
Salt and pepper the bad boy.
Once it's all juicy and squishy.
Pour it over some pasta.
Top with parm.
Yum.
I've been thinking a whole lot about local food lately. There are lots of books out these days about the idea of eating food grown right close to where you live. I just read the book Plenty.
 |
It was a great read about a couple who live off of food grown and processed within 100 miles of their Vancouver B.C. home. They did it for a year. It was hard. They didn't find wheat until the very end. They lost weight. They are idealistic way beyond anything I am capable of. I applaud their effort. They have a cool website about the 100 mile diet. It's definitely gotten me thinking about eating locally. I've always bristled at eating an organic apple from New Zealand, when we have such fine apples right here in our own state. Heck, right in my own back yard. I've tried to buy produce that was locally grown, but haven't worked very hard with the other stuff. It's a complex issue, because even if you do find local items, who knows how far it's been shipped for processing and packaging. In Plenty, they state that Dungeness Crab is routinely sent to China to be picked apart and processed and then sent back here to sell. That is staggering to me. . . though not entirely surprising. All the more reason to support our local farms and feel darn good about it.
A few other books about local eats to ponder:

 |
 |
Thursday, June 28, 2007
Fruit Stickers
Okay, I'm eating an organic apple the other day and end up chewing up one of the little stickers they put on EACH AND EVERY PIECE of fruit. I fished it out of my mouth, but in the process, started wondering about those stickers. I spent extra money on an organic apple. I expect that it's going to be good for me. I wonder what those stickers are made of, I wonder what the adhesive is made of, I wonder if I just chewed on something really bad for me.
As most people these days, I turned to the internet and though I didn't track most of my research (read: take what I say with the understanding that it could be wrong), I discovered a few things about those little stickers. From what I can tell, the stickers use FDA approved food grade adhesive. I could not find out if EVERY sticker is made of this stuff (I wonder about fruit imported from other countries) or what exactly "food grade adhesive" is (I wonder what the FDA thinks is "food grade" and if I'd agree). I found one company that makes stickers for fruit and on that site, they assured me that the stickers are "lead free." This made me wonder if some stickers are not "lead free."
Here is something that I found all over the web and I find most interesting. By looking at the number on the sticker, you can tell if a piece of fruit is organically grown, conventionally grown, or genetically engineered. Each piece of produce has a universal PLU code that is 4 digits. If it is organic, there is a 9 put in front of the code, if it is genetically engineered, there is an 8 put in front of the code. For example, a conventionally grown banana has a PLU code of 4011. An organic banana would read: 94011. A genetically engineered banana would read: 84011. Now, that is a handy little thing to know. I have to say, I'd really rather eat locally grown fruit that I picked myself, but as that is not always an option, I'm glad to have more tools to understand what I'm buying.
By the way, I don't recommend chewing on an apple sticker, they are not tasty!
So, here's a tasty way to eat up your yummy veggies! I like to serve this over brown rice. You could easily substitute leeks for the onions, garlic tops for the garlic and use any of your greens instead of the spinach. The key to the taste is the homemade curry powder. If this is your main course, it really only serves 2 people. Enjoy!
Indian Chickpeas over Garlic Spinach
This recipe relies on several spices, such as fennel seeds, cumin seeds, coriander, and red pepper, for a simple, homemade curry powder. Measuring out the separate spices is worth the extra effort; it has a brighter flavor than packaged curry powder. The fennel and cumin seeds add a pleasing crunch and pungency.

4 teaspoons olive oil, divided
2 cups sliced onion
1 1/2 cups canned vegetable broth
1 teaspoon fennel seeds
1 teaspoon cumin seeds
1 teaspoon ground coriander
1/4 teaspoon salt
1/4 teaspoon ground red pepper
1 (19-ounce) can chickpeas (garbanzo beans), drained and divided
2 garlic cloves, chopped
16 cups chopped spinach (about 12 ounces)
1/2 cup plain fat-free yogurt
Heat 2 teaspoons oil in a large nonstick skillet over medium-high heat. Add onion; sauté 5 minutes. Add broth and next 5 ingredients (broth through red pepper), and bring to a boil. Reduce heat, and simmer 5 minutes.
CALORIES 247 (26% from fat); FAT 7.4g (sat 0.8g,mono 3.4g,poly 0.6g); PROTEIN 13.8g; CHOLESTEROL 1mg; CALCIUM 251mg; SODIUM 882mg; FIBER 11.3g; IRON 5.7mg; CARBOHYDRATE 46.1g
Cooking Light, JUNE 2004
As most people these days, I turned to the internet and though I didn't track most of my research (read: take what I say with the understanding that it could be wrong), I discovered a few things about those little stickers. From what I can tell, the stickers use FDA approved food grade adhesive. I could not find out if EVERY sticker is made of this stuff (I wonder about fruit imported from other countries) or what exactly "food grade adhesive" is (I wonder what the FDA thinks is "food grade" and if I'd agree). I found one company that makes stickers for fruit and on that site, they assured me that the stickers are "lead free." This made me wonder if some stickers are not "lead free."
Here is something that I found all over the web and I find most interesting. By looking at the number on the sticker, you can tell if a piece of fruit is organically grown, conventionally grown, or genetically engineered. Each piece of produce has a universal PLU code that is 4 digits. If it is organic, there is a 9 put in front of the code, if it is genetically engineered, there is an 8 put in front of the code. For example, a conventionally grown banana has a PLU code of 4011. An organic banana would read: 94011. A genetically engineered banana would read: 84011. Now, that is a handy little thing to know. I have to say, I'd really rather eat locally grown fruit that I picked myself, but as that is not always an option, I'm glad to have more tools to understand what I'm buying.
By the way, I don't recommend chewing on an apple sticker, they are not tasty!
So, here's a tasty way to eat up your yummy veggies! I like to serve this over brown rice. You could easily substitute leeks for the onions, garlic tops for the garlic and use any of your greens instead of the spinach. The key to the taste is the homemade curry powder. If this is your main course, it really only serves 2 people. Enjoy!
Indian Chickpeas over Garlic Spinach
This recipe relies on several spices, such as fennel seeds, cumin seeds, coriander, and red pepper, for a simple, homemade curry powder. Measuring out the separate spices is worth the extra effort; it has a brighter flavor than packaged curry powder. The fennel and cumin seeds add a pleasing crunch and pungency.
4 teaspoons olive oil, divided
2 cups sliced onion
1 1/2 cups canned vegetable broth
1 teaspoon fennel seeds
1 teaspoon cumin seeds
1 teaspoon ground coriander
1/4 teaspoon salt
1/4 teaspoon ground red pepper
1 (19-ounce) can chickpeas (garbanzo beans), drained and divided
2 garlic cloves, chopped
16 cups chopped spinach (about 12 ounces)
1/2 cup plain fat-free yogurt
Heat 2 teaspoons oil in a large nonstick skillet over medium-high heat. Add onion; sauté 5 minutes. Add broth and next 5 ingredients (broth through red pepper), and bring to a boil. Reduce heat, and simmer 5 minutes.
Place 1/2 cup chickpeas in a food processor; process until minced. Add minced chickpeas and remaining chickpeas to onion mixture. Bring to a boil; reduce heat, and simmer 10 minutes.
Heat remaining 2 teaspoons oil in a Dutch oven over medium-high heat. Add garlic, and sauté 30 seconds. Add spinach; sauté 3 minutes or until spinach is just wilted.
Spoon 1/2 cup spinach mixture onto each of 4 plates. Top each serving with 3/4 cup chickpea mixture; dollop each serving with 2 tablespoons yogurt.
CALORIES 247 (26% from fat); FAT 7.4g (sat 0.8g,mono 3.4g,poly 0.6g); PROTEIN 13.8g; CHOLESTEROL 1mg; CALCIUM 251mg; SODIUM 882mg; FIBER 11.3g; IRON 5.7mg; CARBOHYDRATE 46.1g
Cooking Light, JUNE 2004
Friday, June 22, 2007
Greens Pie
I know, that doesn't sound appetizing, but the recipe to follow kicks some serious butt. It's pretty simple to prepare too. My notes tell me that last time I made this, I wanted more dill and more feta than what's called for in the recipe. You can use any greens for this, including your salad mix. I used some of the leeks from our farm share in addition to the onions. Phyllo dough is often found in the freezer section of the grocery store. At Safeway, it’s with the pre-made crusts and frozen pies. Use your leftover phyllo to make a berry tart. There's a recipe down there. Yum!
Greek Greens and Sweet Onion Pie
Fresh dill and feta cheese flavor this double phyllo-crusted pie. Serve with vegetable soup and crusty bread. Cutting slits into the top phyllo layer allows steam to escape so the crust will be crisp. To serve a larger crowd, double the recipe, and bake the pies side by side in the oven.
Ingredients
2 quarts water
12 cups torn Swiss chard (about 3/4 pound)
8 cups torn spinach (about 1/2 pound)
Cooking spray
2 cups chopped Vidalia or other sweet onion
2 garlic cloves, minced
1/4 cup chopped fresh dill
1/4 cup chopped fresh flat-leaf parsley
3/4 cup (3 ounces) crumbled feta cheese
2 large eggs, lightly beaten
2 large egg whites, lightly beaten
1/2 teaspoon freshly ground black pepper
1/4 teaspoon salt
10 sheets frozen phyllo dough, thawed
Preparation
Bring 2 quarts water to a boil in a large Dutch oven. Add the chard and spinach; cook 2 minutes or until tender. Drain well. Place chard mixture on several layers of paper towels; squeeze until barely moist.
Preheat oven to 375°.
Heat a large nonstick skillet coated with cooking spray over medium-high heat. Add onion; sauté 5 minutes or until tender. Add garlic; sauté 1 minute. Add chard mixture, dill, and parsley, stirring well to combine. Cook 1 minute or until thoroughly heated. Remove from heat. Combine chard mixture, cheese, eggs, and egg whites, tossing well to combine. Stir in pepper and salt.
Place 1 phyllo sheet on a large cutting board or work surface (cover remaining dough to prevent drying); lightly coat phyllo sheet with cooking spray. Place phyllo sheet in a 9-inch pie plate coated with cooking spray, allowing edges to overlap plate rim. Repeat the procedure with 6 additional phyllo sheets, placing sheets in a crisscross design. Spoon the spinach mixture over phyllo. Lightly coat each of remaining 3 phyllo sheets with cooking spray, and place sheets over spinach mixture in a crisscross design. Roll excess phyllo into the dish to create a decorative edge; press lightly to hold. Cut 4 (2-inch) slits in top of pie; cover with foil. Bake at 375° for 10 minutes. Uncover and bake an additional 30 minutes or until crust is crisp and golden. Cut pie into 8 wedges.
Yield
4 servings (serving size: 2 wedges)
Nutritional Information
CALORIES 312(30% from fat); FAT 10.5g (sat 4.8g,mono 3.5g,poly 1.1g); PROTEIN 16.1g; CHOLESTEROL 125mg; CALCIUM 264mg; SODIUM 955mg; FIBER 5.9g; IRON 6.1mg; CARBOHYDRATE 40.3g
Cooking Light, APRIL 2004
We had a lot of salmon berries around here last night and a couple of pears. I used the following recipe as a starting point for a yummy dessert. I used salmon berries, a few pears, lime juice and added some raspberry jam to the filling to help sweeten those perky salmon berries. The end result was very tasty. Especially with ice cream!
Low Fat Blackberry and Apple Tart
Greek Greens and Sweet Onion Pie
Fresh dill and feta cheese flavor this double phyllo-crusted pie. Serve with vegetable soup and crusty bread. Cutting slits into the top phyllo layer allows steam to escape so the crust will be crisp. To serve a larger crowd, double the recipe, and bake the pies side by side in the oven.
Ingredients
2 quarts water
12 cups torn Swiss chard (about 3/4 pound)
8 cups torn spinach (about 1/2 pound)
Cooking spray
2 cups chopped Vidalia or other sweet onion
2 garlic cloves, minced
1/4 cup chopped fresh dill
1/4 cup chopped fresh flat-leaf parsley
3/4 cup (3 ounces) crumbled feta cheese
2 large eggs, lightly beaten
2 large egg whites, lightly beaten
1/2 teaspoon freshly ground black pepper
1/4 teaspoon salt
10 sheets frozen phyllo dough, thawed
Preparation
Bring 2 quarts water to a boil in a large Dutch oven. Add the chard and spinach; cook 2 minutes or until tender. Drain well. Place chard mixture on several layers of paper towels; squeeze until barely moist.
Preheat oven to 375°.
Heat a large nonstick skillet coated with cooking spray over medium-high heat. Add onion; sauté 5 minutes or until tender. Add garlic; sauté 1 minute. Add chard mixture, dill, and parsley, stirring well to combine. Cook 1 minute or until thoroughly heated. Remove from heat. Combine chard mixture, cheese, eggs, and egg whites, tossing well to combine. Stir in pepper and salt.
Place 1 phyllo sheet on a large cutting board or work surface (cover remaining dough to prevent drying); lightly coat phyllo sheet with cooking spray. Place phyllo sheet in a 9-inch pie plate coated with cooking spray, allowing edges to overlap plate rim. Repeat the procedure with 6 additional phyllo sheets, placing sheets in a crisscross design. Spoon the spinach mixture over phyllo. Lightly coat each of remaining 3 phyllo sheets with cooking spray, and place sheets over spinach mixture in a crisscross design. Roll excess phyllo into the dish to create a decorative edge; press lightly to hold. Cut 4 (2-inch) slits in top of pie; cover with foil. Bake at 375° for 10 minutes. Uncover and bake an additional 30 minutes or until crust is crisp and golden. Cut pie into 8 wedges.
Yield
4 servings (serving size: 2 wedges)
Nutritional Information
CALORIES 312(30% from fat); FAT 10.5g (sat 4.8g,mono 3.5g,poly 1.1g); PROTEIN 16.1g; CHOLESTEROL 125mg; CALCIUM 264mg; SODIUM 955mg; FIBER 5.9g; IRON 6.1mg; CARBOHYDRATE 40.3g
Cooking Light, APRIL 2004
We had a lot of salmon berries around here last night and a couple of pears. I used the following recipe as a starting point for a yummy dessert. I used salmon berries, a few pears, lime juice and added some raspberry jam to the filling to help sweeten those perky salmon berries. The end result was very tasty. Especially with ice cream!
Low Fat Blackberry and Apple Tart
This blackberry and apple tart is the result of a morning's apple and blackberry picking at a local farm. Phyllo dough is a great substitute for regular pastry.
INGREDIENTS:
- 3 medium apples, peeled, cored and sliced
- 1/2 dry pint of blackberries
- 1/4 cup sugar
- 2 tbsp lemon juice
- 8 sheets phyllo dough
PREPARATION:
Preheat oven to 375 degrees. Toss apples slices and blackberries in a medium bowl with sugar and lemon juice. Meanwhile, remove eight sheets of phyllo dough from the pack. I use 14-inch by 9-inch sheets.
If yours are 14 by 18, then cut them in half. Lay the phyllo sheets on a clean work surface or cutting board.
To prevent the sheets from drying out, cover with plastic or wax wrap and then with a damp cloth. Removing one sheet at a time and covering the remainder, spray each sheet with butter-flavored cooking spray, then lay sheet in a 9-inch pie dish, with the sides hanging over the edge. Repeat with remaining sheets, forming a circular pattern.
Fill the center with the apple and blackberries, then bring up the sides of the dough and fold in, leaving a gap in the center. Spray with butter-flavored spray or brush with egg white.
Bake for 30 minutes, until the crust is golden brown.
Serves 6.
Per Serving: Calories 170, Calories from Fat 16, total Fat 1.7g (sat 0.3g), Cholesterol 0mg, Sodium 114mg, Carbohydrate 36.4g, Fiber 3.5g, Protein 2g
Subscribe to:
Posts (Atom)